MacM1 安裝 iTerm2
❒ 環境
- Mac M1
- M1 終端機 shell 預設為 zsh
❒ iTerm2
有兩種安裝方式 ① iTerm2 官網 ② HomeBrew,此篇文章將會使用 HomeBrew 來安裝 iTerm2。
➊ 安裝 HomeBrew
HomeBrew 依照是 Mac OS X 的套件管理工具,把下方指令輸入到終端機,接著就等它安裝囉!
M1 電腦安裝 HomeBrew 會被安裝在
/opt/homebrew路徑下,所以如果安裝在/usr/local/Homebrew目錄下是找不到的。1
/bin/bash -c "$(curl -fsSL https://raw.githubusercontent.com/Homebrew/install/HEAD/install.sh)"
安裝過程會需要一點時間。
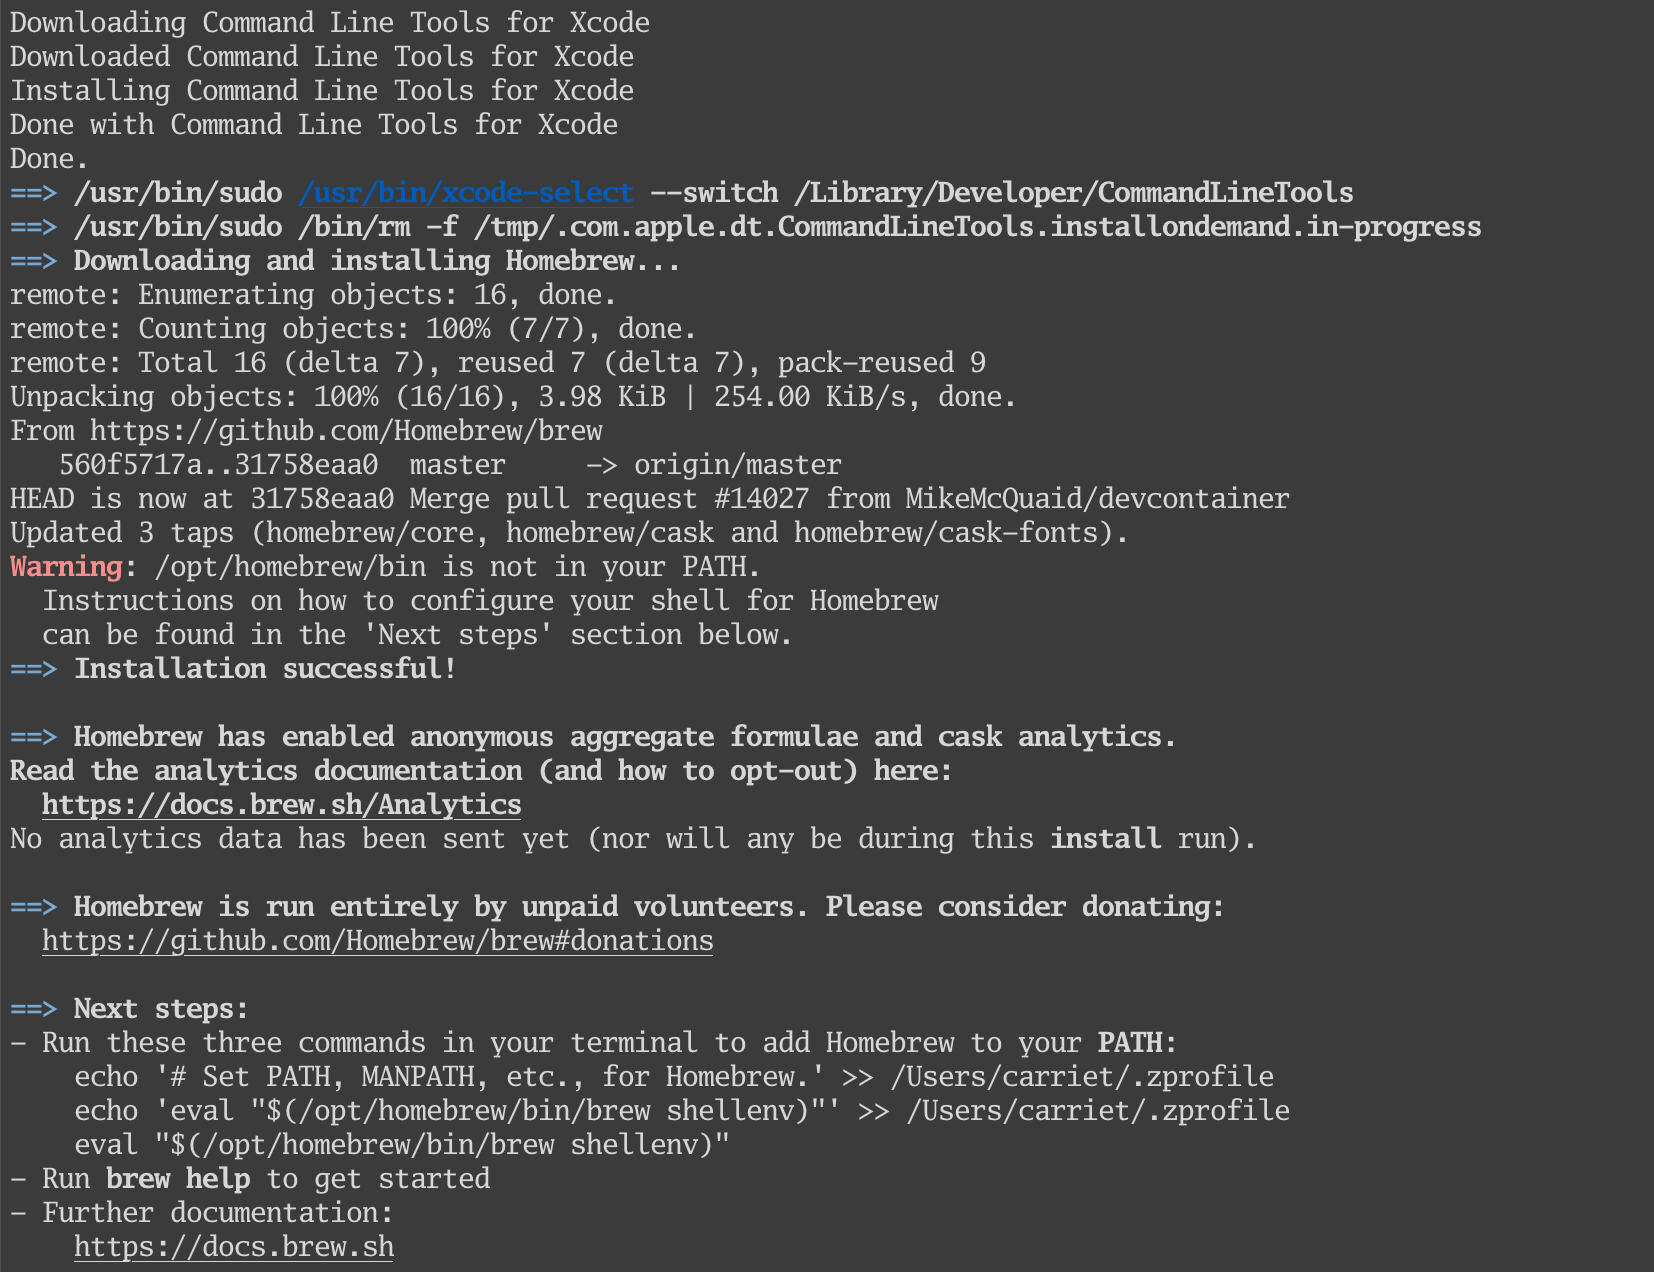
把下方指令輸入於終端機,會把 HomeBrew 加到你的
~/.zprofile路徑中 ( 加入此路徑才能讓用 brew 指令安裝的套件在執行的時候被找到 )。1
2echo 'eval $(/opt/homebrew/bin/brew shellenv)' >> ~/.zprofile
eval $(/opt/homebrew/bin/brew shellenv)在終端機執行此指令
1
brew help
重啟終端機,輸入指令查看是否有成功,成功會跳出 Homebrew 版本號。
1
brew --version

➋ HomeBrew 安裝 iTerm2
1 | brew install --cask iterm2 |
安裝成功後就可在電腦的應用程式中看到囉 !( 路徑: /Applications/iTerm.app )
❒ Oh My ZSH
① 於終端機輸入指令安裝 Oh My ZSH。
1 | sh -c "$(curl -fsSL https://raw.githubusercontent.com/ohmyzsh/ohmyzsh/master/tools/install.sh)" |
執行完上面指令後,終端機原本的 % 符號變成 → ~。
調整 iTerm 與終端機字體及 theme
字體可依自己喜好設定,建議使用 Nerd Font 系列字型才能支援完整的顯示效果。
② 下載 GoMono nerd Font 字型。可參考此文章中的 “ 老師!我想知道!要怎麼讓終端機變漂亮呢 - Mac 篇 ” 或 “ 安裝 oh my zsh - 安裝字型” 。
③ 調整主題:輸入指令開啟 .zshrc 檔案,把檔案中的 ZSH_THEME="robbyrussell" 改為 ZSH_THEME="agnoster"。
1 | open ~/.zshrc |
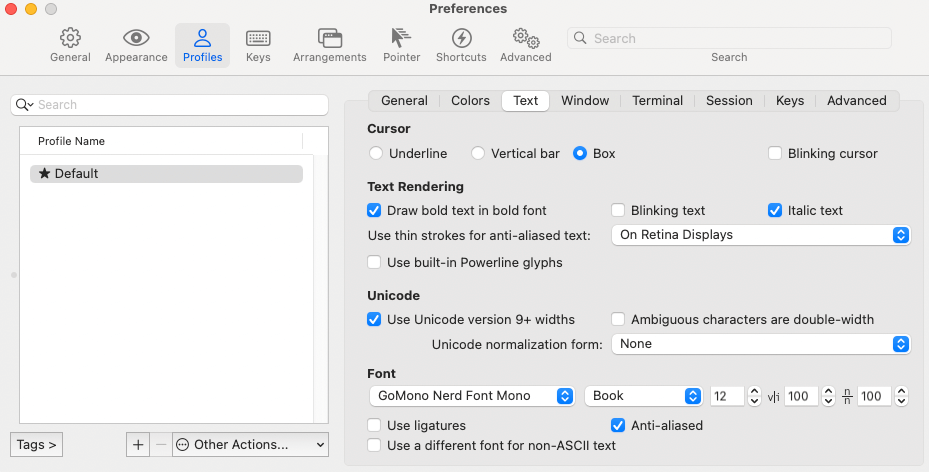
④ 電腦應用程式中開啟 iTerm,按下快捷鍵 command + , 進行設定。於 Preferences → Text 中把 Font 調整為步驟 2 下載的字型 GoMono Nerd Font Mono。
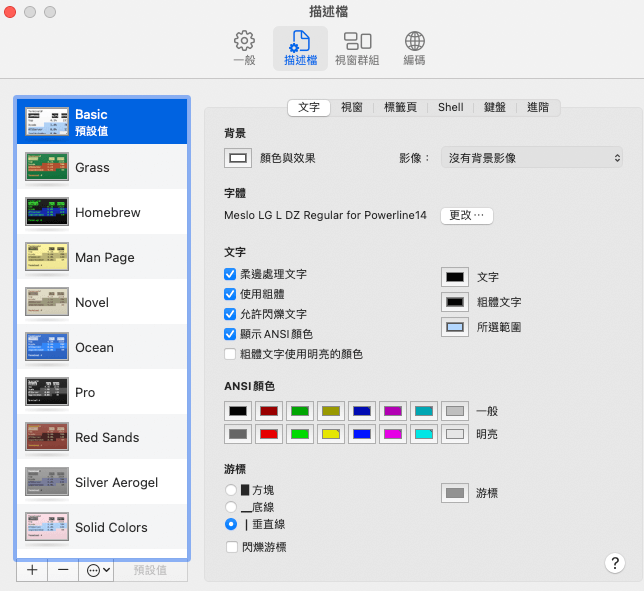
⑤ 開啟終端機,使用快捷鍵 command + , 進行終端機文字設定,在描述檔的文字中,把字體調整為 GoMono Nerd Font Mono 。
安裝主題套件並調整主題色
可依自己喜好設定,下面主題擇一
第一種主題: agnoster 主題
Oh My ZSH Themes 文件 ( ****agnoster** )
輸入指令開啟 .zshrc 檔案,把檔案中的 ZSH_THEME="robbyrussell" 將它改為 ZSH_THEME="agnoster" ( 調整 Oh-my-zsh 主題 )。
1 | open ~/.zshrc |
第二種主題 powerlevel9k ( 筆者使用此主題 )
① 安裝 **powerlevel9k**
目前出到 Powerlevel10k,可以嘗試看看。
1 | git clone https://github.com/bhilburn/powerlevel9k.git ~/.oh-my-zsh/custom/themes/powerlevel9k |
② 開啟 .zshrc 輸入指令
1 | open ~/.zshrc |
③ 調整顏色
iTerm2 挑選配色,可參考「 Iterm2-color-schemes 」,網頁中可以看到很多不同配色,挑選一個自己喜歡的配色,在喜歡的配色的名字按右鍵,並選擇另存連結後將檔案儲存下來。
- 以筆者這邊選擇「 Tomorrow Night Eighties 」,另存連結就會下載一個
Tomorrow Night Eighties.itermcolor的檔案。
- 以筆者這邊選擇「 Tomorrow Night Eighties 」,另存連結就會下載一個
下載好後,開啟 iTerm 使用快捷鍵
command + ,於 Preferences > Profiles > Colors,右下角Color Presets..打開選單,並選擇 Import 把下載的檔案載入。筆者這邊選擇 Builtin Solarized Light。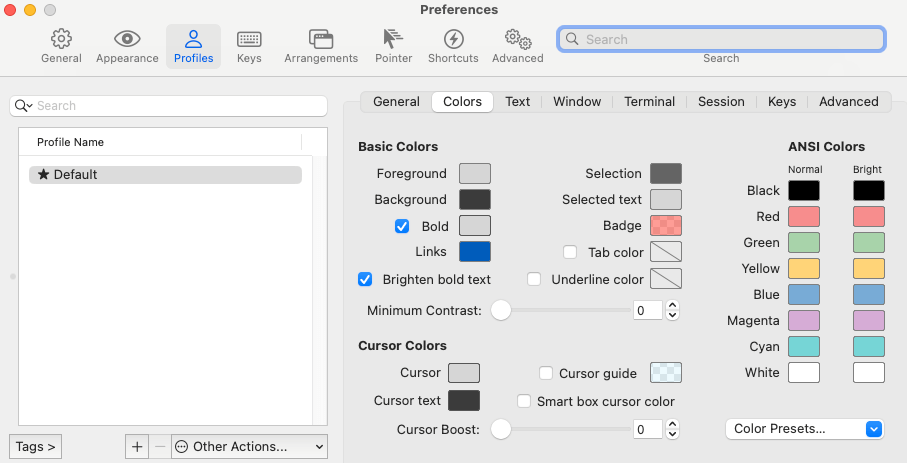
④ 把下面內容加入 .zshrc 檔案,記得按儲存 ( 依自己喜好設定 )
更多提示設定可參考 Stylizing Your Prompt 文件
1 | # 當前主題 |
.zshrc 檔案中
POWERLEVEL9K_LEFT_PROMPT_ELEMENTS與POWERLEVEL9K_RIGHT_PROMPT_ELEMENTSPOWERLEVEL9K_RIGHT_PROMPT_ELEMENTS=(command line 右邊顯示的內容)1
2
3
4# 下圖一
POWERLEVEL9K_RIGHT_PROMPT_ELEMENTS=(status ram load time)
# 下圖二
POWERLEVEL9K_RIGHT_PROMPT_ELEMENTS=(status background_jobs time)

_BACKGROUND顏色可參考文件「 Stylizing Your Prompt 中的 Segment Color Customization 」1
2
3POWERLEVEL9K_DIR_HOME_BACKGROUND='填顏色'
POWERLEVEL9K_DIR_HOME_SUBFOLDER_BACKGROUND='填顏色'
POWERLEVEL9K_DIR_DEFAULT_BACKGROUND='填顏色'
⑤ 輸入指令,就會出現設定好的樣式囉
1 | exec $SHELL |
❒ 查看終端機 shell 為哪種腳本語言的兩種方式
① 開啟終端機後,於最上方欄位可以看到是哪種腳本。

② 使用指令
可使用指令 echo $SHELL 驗證,如果是會回傳 /bin/zsh 。